Followers

Sunday, 12 April 2020

A couple of old bags!

Good afternoon and a Happy Easter to you all.
Welcome to the new people who have recently started to follow my blog! I am pleased to have you here. I do hope you find something of interest here. Leave me a comment on here if you do!
It's been a very quiet day here but to be honest I don't mind that as I can just do whatever I like and I don't feel pressured to have to go out and see people. That makes me sound like a real hermit but those of you who know me properly know I am not! But I do think that at holidays people feel that they must go a visit people but of course this year we absolutely cannot! 
I thought I would play with the Rocky Block stencil again today and include another product of the month and use the Handbags & Purses stamp set . I have made a card and done a step by step for you too.
Here is what I did and now you understand the blog title.
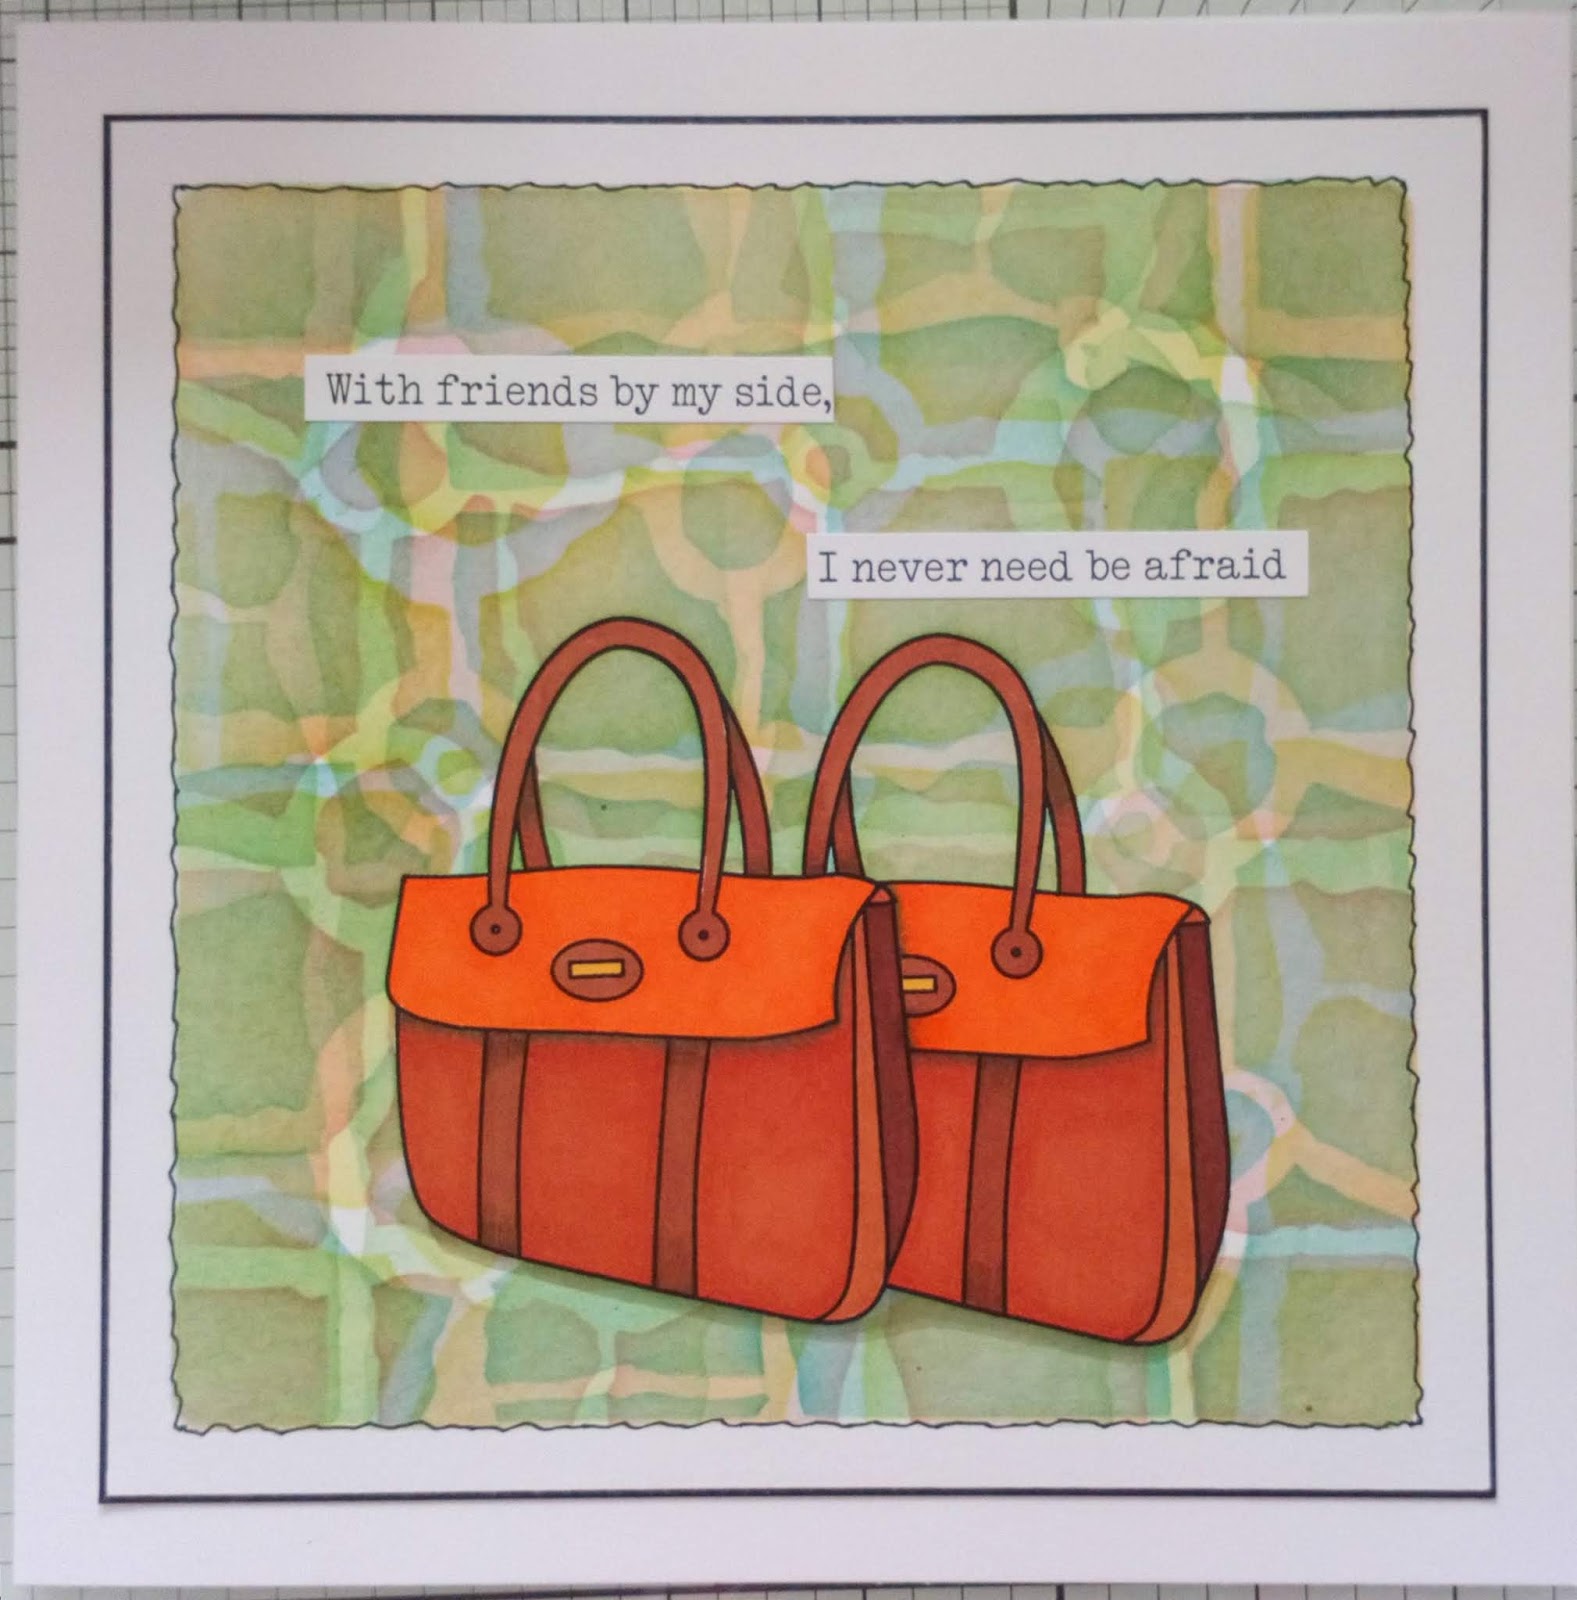


I used the stencil and the stamp set, a piece of stencil card plus 4 distress inks and Leonie's sticker set.


Here's how I did it.
 

Stamp the bag then mask off. Stamp again so they overlap then mask that one too. (I had cut some out before I remembered I had the masks! But I used the handles as I didn't want to cut those out!)


Now attach the stencil with some low tack tape along one edge so it acts as a hinge.

Brush the yellow ink through the stencil 


Take the stencil off and turn it a quarter turn, then brush over with the pink ink.
Turn it again and brush with blue and then again with the green.


Remove the masks.


Draw a wiggly line around the stenciled shape with a micron pen
 then edge the card with a black sharpie.

Colour the bags with promarkers

Put a shadow under the bags with a grey promarker.


Attach to the front of an 8x8 card blank then add a sticker sentiment.

I hope you like the card today and that it has inspired you to have a go. Don't forget you could change the focal stamp to anything really or just do the background and use a silhouette stamp. 

Have a lovely evening.

Happy crafting and stay safe.


Saturday, 11 April 2020

Rocky block doodle

Good afternoon all . 
Isn't it a beautiful day. I do hope that you have been able to get out into your own outdoor space and enjoy this sun we're having but keeping safe and well at the same time.
Actually I think just seeing the sun and having the windows and back door open makes you feel better.....well it does me. It lifts my mood and that helps keep dark thoughts form creeping in. It is hard not to dwell on things at the moment but I am trying to limit the amount of news I look at during the day and I am trying to keep busy with lots of things. 
I have been enjoying doing Maria's online stamping class. Her classes are always a highlight of my month with fab projects.  But with the virus they have had to stop but Maria has worked out how to continue with them online. If you fancy doing one of her classes you can contact her direct through Facebook....you will not be disappointed I can promise you that.
I was looking at the Claritystamp website earlier and saw what the products of the month are. One is the Rocky block Stencil. It's fab! So I thought I would dig it out and do a few projects with it over the next few days. I will probably include some of the other products of the month too but I will highlight those as I do.
Today I thought I would share with you a sample I made back in July 2019 ...awwww a very happy month that was (Amy and Matty got married). 

Here it is. I thought it fitted into my recent theme of doodling too.


I don't have a step by step today but its actually very easy to achieve.
All you need is a piece of 7 x 7 stencil card, the rocky block stencil and a black micron pen. These are the pens that Barbara has been using when doing the doodle sessions on her fb lives over the past week.
Attach the stencil to the to the card with some low tack tape so its like a hinge at the top.
Use a black micron pen to draw around all the stencil to give you the outlines.
Remove the stencil then doodle in each section with a different pattern. I coloured the eye in to add a splash of colour. You could change this by doing something different in that section.
Edge the card with a black sharpie pen then mat onto a piece of card to reflect the splash of colour you added.
Attach to an 8x8 card blank then add one of Barbara's stickers. Job done.

There are a few clarity stencils that you could use if you look through your stash 
If you have a go let me know. I would love to see it if possible
Happy Crafting


Friday, 10 April 2020

Gratitude for doodles

Good afternoon all! I hope you have had a good Good Friday. I decided to sit outside today for a little while and found a perfect spot that was away from the main part of the garden. I suffer if I get bitten or stung so I can't sit on the lawn as this is where I nearly always eaten alive! But it was nice to sit a while and get some fresh air. I am not sure if Colin was pleased though as he was working in the garden and I was chatting to him......no escape from me today! I might do that again tomorrow if the weather is as nice as it says it's going to be!
I think it did me good as I came in and got on to do a step by step card to share with you. It is only a very simple one but it can be easily changed by using a different word or using a different colour.
So here it is. 


 Ingredients
Cracked pistachio Distress Ink
Versafine Onyx Black Ink
Stencil card
Low tack tape

Start off by taping off a section of the card. I cover the parts you want white with tape to avoid smudges.

Using the square stamp from the set mask off the edge then ink up. Remove the tape then stamp this over the area you have masked off. 

 Mask off both sides of the stamp and repeat the stamping making sure you stamp touching the previous one. Continue masking and stamping until the panel is filled. Leave to dry. 
Now get a brush and the distress ink.

Brush the ink over the top and bottom of the panel building up the colour next to the tape but leaving the centre of the panel paler.

Carefully remove the tape and using a fineliner pen draw a wobbly line along the top and bottom of the panel. Then stamp the border along the panel as shown.


On a piece of spare card stamp the word and then use a blending tool to add ink around the edge.


Use a black sharpie pen to edge the card. Attach to an 8x8 card blank then add the word with 3D foam.


I hope you like the project today. Have a go if you like but if you do please let me know how you get on.

Happy Crafting 


Wednesday, 8 April 2020

A bit of some Doodleology!

Good afternoon all! I hope you are all ok! 
It has been a very lovely day today. Bright sunshine and quite warm too! The only downside is that it brings people out when they should be staying at home!.
I can't sit in the garden as if I do I end up with bites and stings and I don't want that! But it is nice to see the sun and have the windows and back door open ….makes a big difference to how I feel!
I have been enjoying doing the doodles with Barbara every morning at 10am on the Claritystamp Facebook page. Or it's on You tube if you want to catch up later with it.
I decided to carry on with the doodle theme and use the Doodleology stamps to create a card. Here is what I made.


Ingredients
Distress inks - Rusty Hinge and Chipped sapphire
Onyx Black Versafine Ink 
Black fineliner
Stencil card 
Black card
A5 card blank 

Start off with the largest stamp out of the set and the two distress inks. Leave the stamp on the acetate to use it rather than putting it on a block


Ink up the stamp with the rusty hinge ink and then lightly spritz the stamp with water(don't overdo this) then stamp it on the card. Repeat using the blue ink trying to get the blue over the orange.

So you should end up with something like this.


Trim the card around the stamped area back 

Using the two ink pads and a fine paintbrush colour in the open areas of the stamp. 
Let it dry.


Stamp the sentiment and the fly away boy into position. I used a stamp press and versafine ink. You could use archival ink.


I used a black fineliner to go around the outside of the stamped area the matted it onto a piece of black paper then onto a card blank.

I hope you like what I did.
Please let me know in the comments below.
If you have a go feel free to post on social media but please tag me in so I can see how you did.

Happy Crafting 


Sunday, 5 April 2020

Fairy Nuff

Good morning all you lovely peeps! I hope this here blog post finds you well and coping with staying home. 

I do hope that people take heed of the instructions to stay home as I really don't want to be on lockdown forever! 
Sadly some people seem to be taking the advice and ignoring it. They seem to think they are invincible and that they are immune from the virus. I suppose the sun coming out doesn't help but use your own outdoor space at your home and if you don't have one then it's tough! 

I had delved into past projects today that I know I haven't blogged so no step by step pictures but there are instructions of the way it was made. 


Ingredients.

Fairy with Toadstool  GRO-FY-41171-01

Woodland owl plate GRO-AN-41049-03
Scalloped Square extension GRO-WO-41166-15
Indian Summer parchment and paper
Pastel brads

1. On designer parchment  emboss  the smallest scalloped square and mark the corners of the central square. Change plates and position the fairy plate to fit in the centre. Emboss the design. Change the plate and emboss the outer lines of the owl plate.
2. Using perga colours add colour to the image as shown.
3. Using a bold 2 needle tool perforate around the lines and around the scalloped edge. Cut away waste.
4. Attach to the designer paper using pale purple brads.  Mount on a card blank.
I hope you like todays project and if you have a go at it post a pic on social media but tag me in so I can see how you got on.

Please leave me a comment below to say Hi!
Stay safe and Happy crafting 


Friday, 3 April 2020

When is a flower not a flower?

Afternoon all! 
How are you all doing? Keeping safe and well I hope. 
I really had to think what day it was today especially as we had no power this morning! Whole area had a big power cut. I lasted about an hour so then we had all alarms going off! Thankfully as people were home they didn't stay on for ages!
Did you watch Barbara on the telly yesterday using the new stamps by Tina Cox? They are really lovely. I decided to craft as I was watching the shows and as I had the floral stamps to hand I decided to use them. But I wanted to do something a bit different. I also had out the March NDC stamp. So that was used too. I also sneaked in one of Sam's Ovaly stamps. Such good fillers!

Here's the card I made.


So where are the flowers I here you ask. Well I used the filler in stamp from the poppy set. Tina's Poppy Spray Unmounted stamp set from Claritystamp.com STA-FL-10960-A5

Here is how I did it.


Take a piece of stencil card and the brayer. Ink the brayer with chipped sapphire distress oxide ink and blend it on the blending mat


Roll this lightly over the stencil card. Barbara calls it walking the brayer. 
Repeat this with scattered straw distress oxide ink. You want a very mottled look.

Now spritz the ink on the blending mat with water

Dip the edges of the card into the ink trying to get it all around the edges but leaving the middle free of the wet ink. Allow to dry or blast it with a heat tool.

Stamp the sentiment in versafine ink then use the filler in stamp in the yellow and blue oxide inks to stamp the circles randomly around the page.

I used two sizes of circles to do this.
Use the yellow and blue ink with a fine paintbrush to fill in the colour of the letters. Also use the dots from Sam's Ovaly stamps to add more texture.


Edge the card with a black sharpie pen and mount onto an 8x8 card blank.

I hope you like what I did.

If you want to have a go please feel free to try but if you do please acknowledge me if you post it on social media.

Stay safe and well. Happy Crafting. xx


Wednesday, 1 April 2020

A proper gem....or not!!

Hi all. Thanks for dropping by. I wish you could. I think that's the biggest thing I am missing with this stay at home malarkey...actually seeing people face to face. But As long as we do as we are told we will come through this and be able to venture out in good time. So for now make the most of being at home.....read a book, or write one! Be creative-draw, paint  doodle, make things. Whatever you do enjoy the moment and allow yourself to focus on the task in hand and not on what is going on out there. It will ease your anxiety and help you cope better. 
I am loving the doodle sessions that Barbara Gray is doing on the Claritystamp Facebook page. I even found a little journal in my crafty stash that I am doing the doodles in. It will be good to look back on and say this is what I did.
Anyway enough waffle for now. 
I posted a card showing faux Gems on Facebook the other day and a few people have asked me what I used and could I blog it. So here it is.

Ingredients
Diagonal Bold grid A5 square GRO-GG-40201-12
A4sq Framework Squares GRO-PA-40721-15
A4sq Framework Circles GRO-PA-40722-15
A5 nested Rectangles GRO-PA-40524-04
Celtic Numbers GRO-WO-41241-XX
Celtic Corners GRO-PA-40872-03
Pink parchment

1.Using the square framework plate emboss the three squares then use the circles to add the frames and gem circles inside the squares. Emboss the smaller numbers and the sentiment in the centre one.
2 Use the rectangle plate to create the outer border. Use designs off the Celtic plate to fill this border in randomly.
3. Colour the gems in the top and bottom circles.
4. Emboss the grid pattern then turn over and perforate in the grid design. Perforate around the outer border.
5. Cut around the outer edge and within the grid design.
6. Mount onto pink paper attaching with mini brads. Add to a card blank.
7. Add the white highlights to the gems using a white pen and add the flowers to the centre.

Please leave me a comment below to let me know what you think...or just to say hello.

Stay safe and happy crafting xxx