Followers

Sunday, 28 September 2014

The Great Outdoors


Good Evening
Having just finished my samples for the Clarity Stamp show next Sunday I thought I would blogs the final two from the last show. 
The first I stamped and embossed in clear powder on water colour card then brushed over in stripes with a wet flat paint brush dipped in some distress re-inkers.


The second on I stamped in black archival onto water colour card then flicked ink at it by flicking the paint brush. I then used ink and a lot of water to fill in the colour on the picture.


I just love the Distress re-inkers

Anyway have a good week ahead!
Happy Crafting


Thursday, 25 September 2014

The Birds!

Good Afternoon
Two more cards for you from September's Claritystamp Show on Create and Craft. I loved the new stamps and Stencils on that show...mind you I say that every month!
This first card started off as me playing with ink and shaving foam and the Bird Tree stencil. The image on the stencil is a little bigger than the stamp but that is great if you want to add some perspective to your work.
I used grunge paste to get the image over the background.


I had added a few hills to the shaving foam background and once the grunge paste was dry I inked it in black. The words were made up by using The from The Great outdoors stamp and the BIRDS was made up from Birthday and friendship from the word Chain stamps.

The next card was made using the stamp. 


I started off by putting the stencil on the card and adding a moon mask. I covered over the top part and spritzed the bottom with brown dylusion ink quite heavily then moved it up a bit and spritzed some more. I then spritzed the sky area with orange then carefully removed the moon mask and spritzed the sky in yellow. I removed the stencil then left it to dry. 
I stamped the tree in black archival ink then cleaned the stamp well and then masked off all but the top 5 birds. I inked these up and stamped them outside the frame to extend the birds outside the picture. I stamped the sentiment in the corner and used watercolour paints to colour it in autumnal colours.

So those were the 2 cards using this set.

Please let me know what you think of these by leaving me a comment.

Happy Crafting

Saturday, 20 September 2014

If one bird can't do it....Toucan!

Good Morning to you all and I thought I would share with you two cards done for the last Clarity Stamp show. The Toucan is a fascinating and almost comical bird! And the stamp does not disappoint! It's fab!

To go with the Toucan there are the most fantastic cheese plant leaves!  We had a plant of this in our old house and it eventually took over a corner of our dining room! Unfortunately it did not survive the move!

 Any way the first card took a lot of masking and then colouring but I think it looks great as if there were just a load of toucans all waiting for something. 


The next card took a bit longer as I had to stamp and colour the leaves, then cut them out...its a good job I like cutting out!
The idea was that the leaves were the jungle and as you opened the jungle up inside a clearing were the toucans hiding!

Here's how the card looked closed 


And here it is open
The leaves on the inside are stamped using the solid leaf shapes and 2 colours of ink. I ad stamped and masked the toucans onto the card so that they would be in front on the leaves. I did use a few that I had cut out around them to add a bit of dimension! 


Thanks for looking! Have a lovely weekend.
Happy Crafting


Monday, 1 September 2014

Nature

Good Morning to you all. By the time you get to look at this I will be back at work and feeling like I have never been away! I can't believe I have had my summer hols! The time has just flown by but I have done lots of lovely thing but I think the highlight of my holiday has to be the trip to the Claritystamp Retreat in Crowborough. 
Anyway back to reality now and doing the job that pays for my crafting addiction!

Today not only see the start of a new school year but it also sees the start of a new Challenge over at the Clarity Blog. Its worth a visit to see all the rules about the challenge and to see all the fabulous projects done by the DT to give you some inspiration. This month the theme is NATURE

Here's mine and for this one I have done a step by step tutorial for the main image of the card at least So here goes!

This is what I got out to start with. I will list everything I used at the end. 


I trimmed a piece of Theuva card top and side by 2 cm


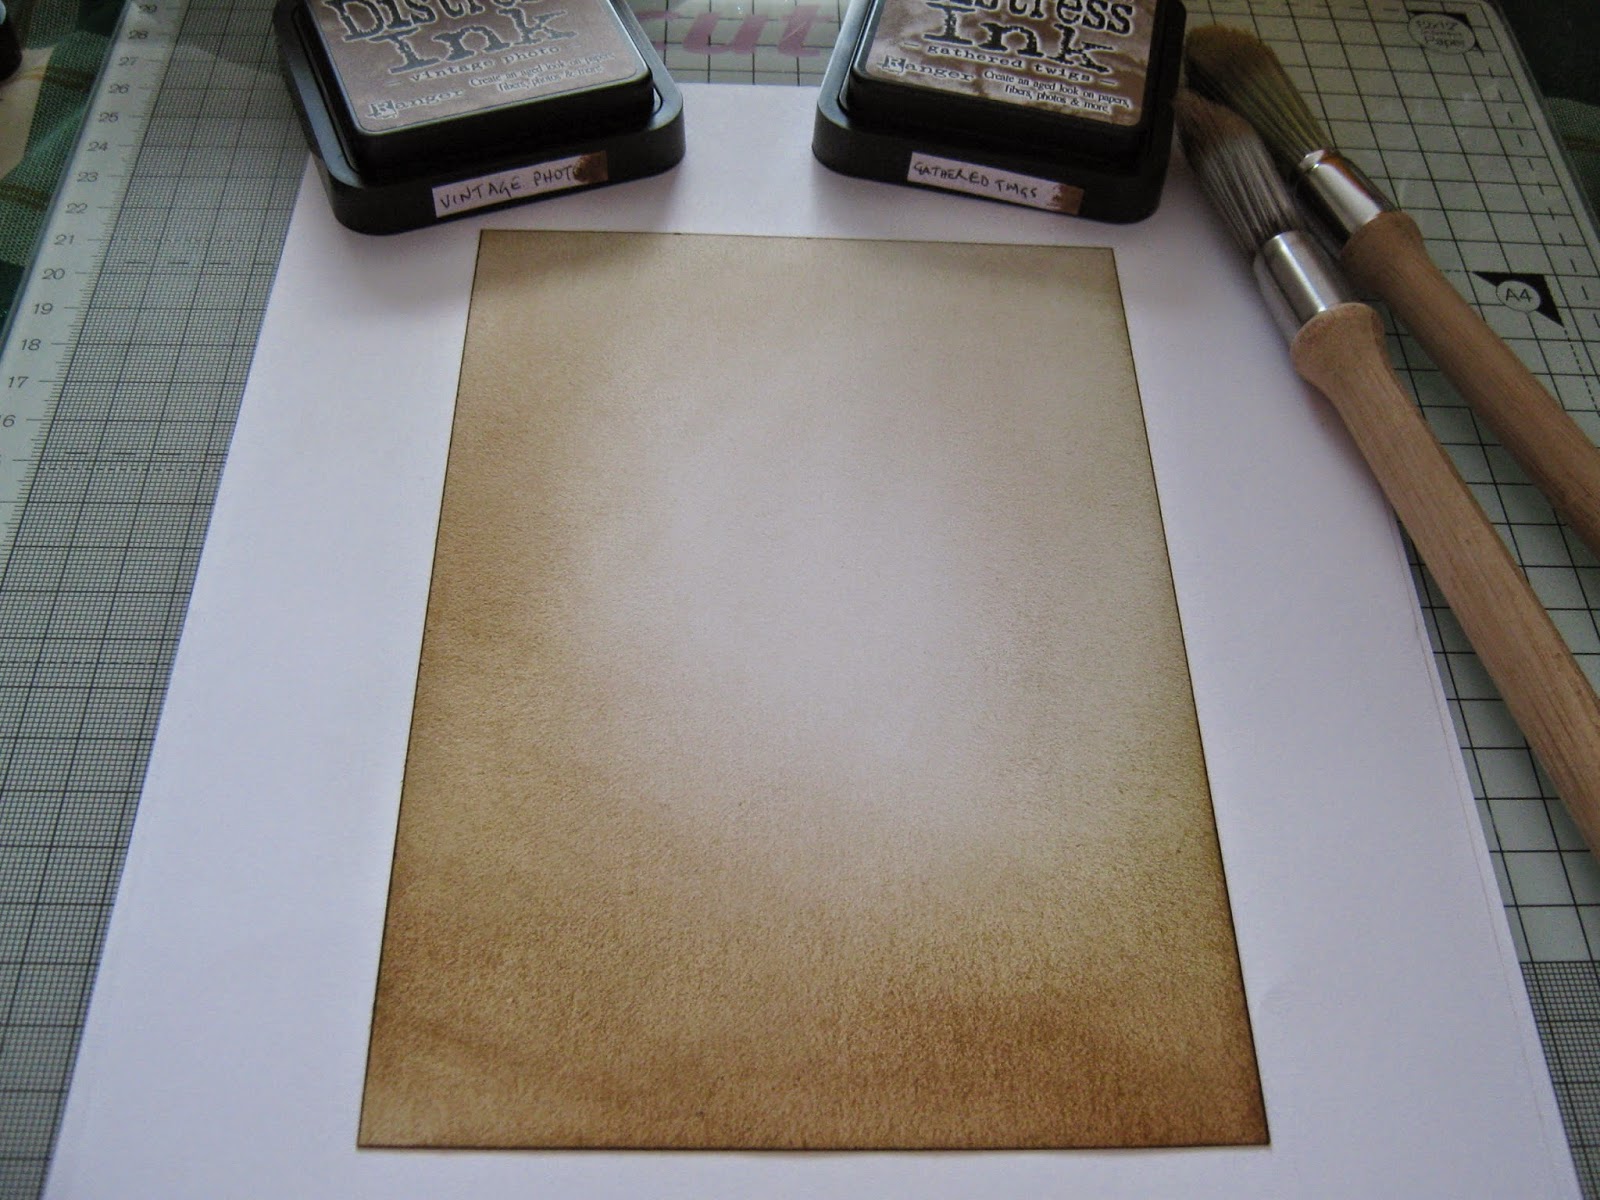
I then brushed the edges with Old Paper Distress ink more round the edges but bringing it into the middle.


I then continued to build up the colour round the edges with Antique Linen, Brushed Corduroy and frayed burlap trying to keep a lightness in the middle but darker up the left hand side and at the bottom.


I finished off with Vintage Photo and Gathered twigs distress inks.
Don't worry if it looks a bit blotchy...its just a background.


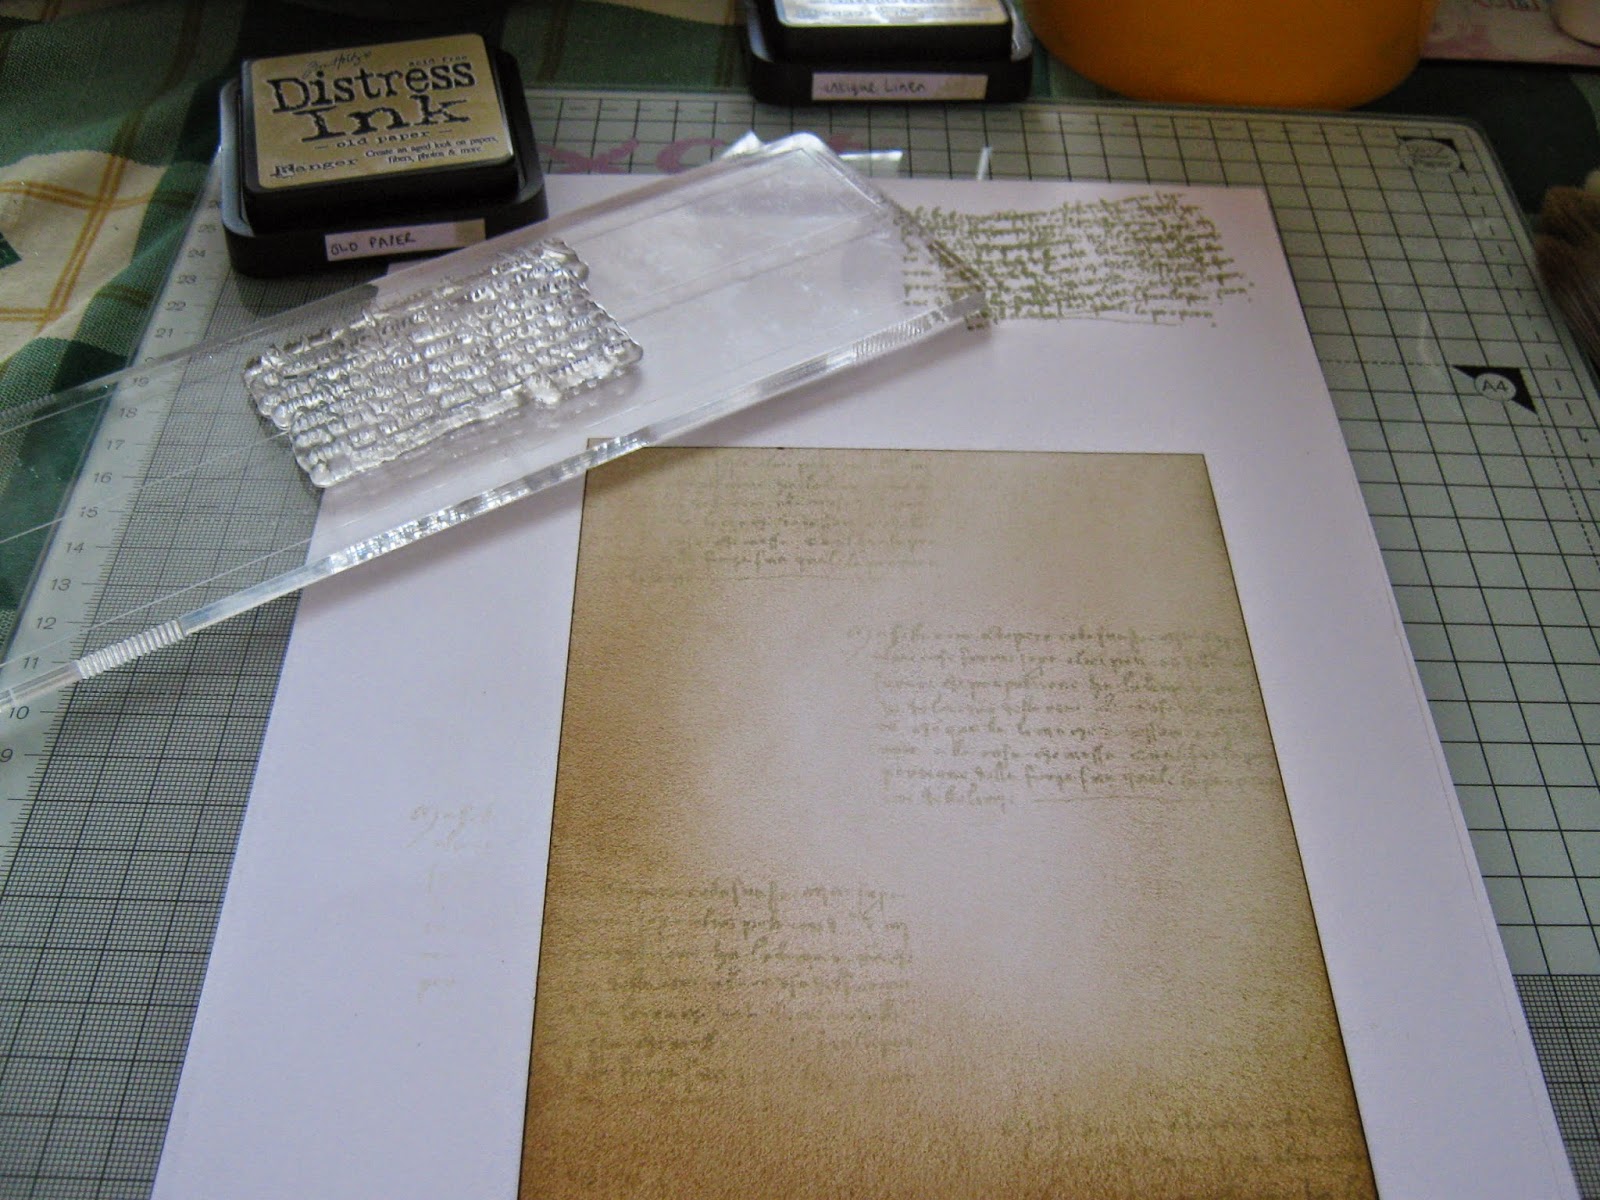
Now use the script and diamonds stamps out of the journaling set. I used Old Paper Distress ink for both of these and second generation ink
(INK BLOT PLOT)


I then took the verse Count your Garden and stamped this in Antique Linen ink. Remember its a background so go off the page and dot it about a bit. And that's the background done. 


Now I got the gathered twigs distress ink pad and used it to stamp the verse,


then the tree branch and the insects. Remember that when you stamp the branch you do some ink blot plot to get the depth.


I then used a blending tool and darkened the edges with Vintage Photo and that was the main image finished.


I matted this on to black card


and trimmed it to a very fine border.


So the rest was a matter of finishing it off. When I was tidying up after making some other cards I found this piece of corrugated craft card so thought that would be perfect. I did go over it with my blending tool and Vintage Photo ink to tone it to the card.. I then tore a piece of brown card and a piece of pale orange and stuck these across the card having attached a piece of twine. I stuck all this onto a card blank 21 x 21 cm. I added the image I had made using foam tape and then added the twine bow and the paper flower. 

And here it is

Please let me know what you think of it.

I hope you spend some time looking at the other DT blogs then have a go at the challenge...you could win yourself £50 voucher to spend with Clarity.


Here's what I used
( Old Paper, Antique Linen, Brushed Corduroy, Frayed Burlap, Vintage Photo and Gathered Twigs)
Lucky set (little dragonfly)
Journaling set(script and diamonds and branch)
Blooming Corner Kit (bee and dragonfly)

Happy Crafting

Thursday, 28 August 2014

Lacy Swallows

Good Morning
I thought that today I would share another of the cards from August 3rd ClarityStamp show

I started off by cutting a piece of theuva card to an oblong and stamping the Arty Heart in the centre.

I then stamped the large and small Lacy Swallow on either side so it looked like they were holding the heart in their beaks (I did just need to use my black micron pen). 

I then masked off the birds and using raspberry adirondack I brushed the bottom of the card fading it to the centre. I then switched to stonewashed blue and getting rid of a lot of ink I brushed the top of the card again fading it so the centre was hardly coloured.

I removed the masks and coloured the birds in using Spectrum Noir pencils. 

To colour the heart I found some pink papers in my stash and black embossed the heart onto 3 different designs. I cut these out then paper pieced the heart.

I drew a wiggly line round the edge twice so it over lapped and drew lines in these spaces then coloured them in pink and blue. I matted the image in pink and blue then onto a white card blank

And here is the finished card. Let me know what you think please!


Hope you have a nice day...its going sunny here!

Happy Crafting

Wednesday, 27 August 2014

Chase your Dreams

Good Morning to you and a fine one it is today!
Not long to go now and I will be back to it and the summer holidays will be a thing of the past!!! They have flown by but that's because they have been so busy. I suppose I have been Chasing my Dream. And I hope that very soon my dream will come true but for the time being work has to be something I do! What I have to remind myself is that without work I would have none of the things I love doing! So I suppose it is a necessary evil!

Anyway enough chatter... when I got this stencil in with the last lot of DT items I just had to use it! 

I ran it through the Grand Calibur to emboss it on a piece of Theuva card and then keeping the stencil in place I brushed it with butterscotch, mountain rose and juniper Adirondacks a bit randomly but the juniper I kept to the outer edges. I then dragged the colour in with a make-up sponge to get a more defined image. 
I then highlighted the words by edging the letters in black micron pen and adding a shadow to them with promarkers. 

I matted it on to black and then a mustard yellow card then a white card blank. I added some flowers in similar orange and yellow tones and that was it!


I hope that you are able to Chase your Dreams

Happy Crafting

Saturday, 23 August 2014

Poppy heads and Moon!

Good Morning everyone and its typical Bank Holiday Weather...wet! But let's not get down hearted about the weather. We are so used to it that we just get on with it don't we. 
There are lots of open air festivals on this weekend around and about this area so it is a shame for them that the weather cannot be better but hey we are in the last week of August now with Autumn on its way and I don't think we've had a bad summer!

This morning Colin has gone out to a Bonsai show so I thought I would take time to update my blog and then settle down to make some more Christmas cards. 

From the Clarity stamp show on August 3rd my favourite set has to be the poppy head and leaves set. Its very funky and reminded me so much of wall paper I had as a teenager. First thing I did was cut out masks for the leaves and the seed heads. 

I then stamped the main image 3 times across the card. I used memento ink as I was using promarkers later. I had cut a piece of theuva card to 7" square. I then masked off the leaves and the seed heads. The next thing was to put the mask of the moon in place. I used the largest size as it was due to be a big moon around that time!

I then brayered the sky in juniper then denim then added a little black to darken it. I did this at an angle so I avoided the dreaded lines! I used the hills mask and a make up sponge to add some hills and mountains. I also used a piece of torn paper to do the ground around the base of the stalks!
The leaves I made my own ink pad for using the distress reinkers like we had been shown by Maria Simms at her workshop and then by Barbara Gray at the Clarity Retreat.
I added colour to the moon by taking off the mask and running my brayer over it without adding ink....its amazing how much it still holds. I then added the outtie mask and used a make up sponge to add moon shadows in blues and yellows....go easy here...you don't need a lot of colour!
I then used the custom ink pad to stamp the leaves around the base of the poppy stems and then 2 at the top into the moon. I used a white micron pen to add the stars. I then removed the masks from the seed heads and leaves and coloured these in with promarkers. I matted it onto black then gold mirri then onto an 8 x 8 card blank.

And here it is!


Please let me know what you think.

Oh and here is the other card made using the same set. Very different aren't they which shows how versatile the stamps are! This is just gold embossed on to centura pearl card...the white side then sprayed with orange yellow and brown dylusion inks. 


I hope you have a pleasant Bank Holiday Weekend!
Happy Crafting